Install
This is the repository archive. It installs, but the folder name will carry the branch suffix and updates will not flow.
Install straight from GitHub with WP-CLI:
wp plugin install https://github.com/sovware/directorist-shopping-centres/archive/refs/heads/main.zipVersion 1.3 adds configurable archive display controls alongside the repeat-safe legacy Shopping Centre tag importer. Administrators can match the complete staging archive or show active-deal centres only without removing centre records or changing the separately controlled homepage widget.
Documentation
- User Guide - English setup and content-management instructions.
- Administrator Guide - day-to-day workflow and media rules.
- Packaged Word Guide - illustrated English guide stored with the extension.
Dynamic shopping centre tiles and shopping-centre deal pages for Directorist listings.
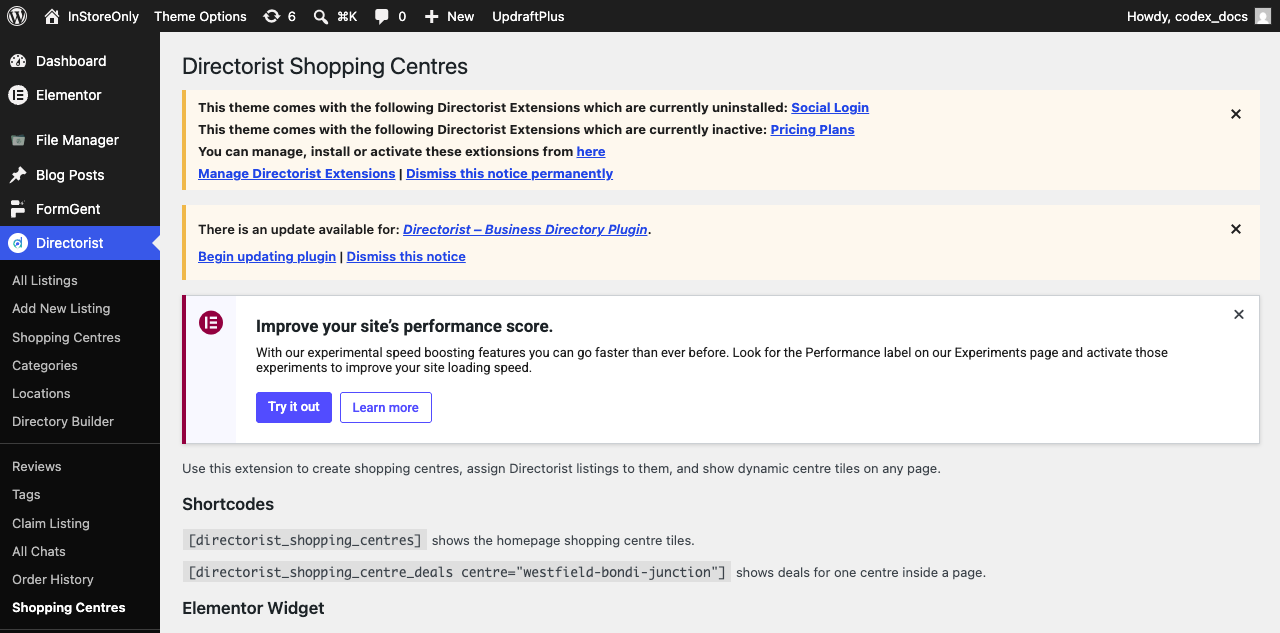
This extension lets an admin create shopping centres, upload a centre image, assign Directorist deal listings to a centre, and display those centres on the homepage with an Elementor widget or shortcode.
What This Extension Does
- Adds a Shopping Centres taxonomy to Directorist listings.
- Adds an image upload field for each shopping centre.
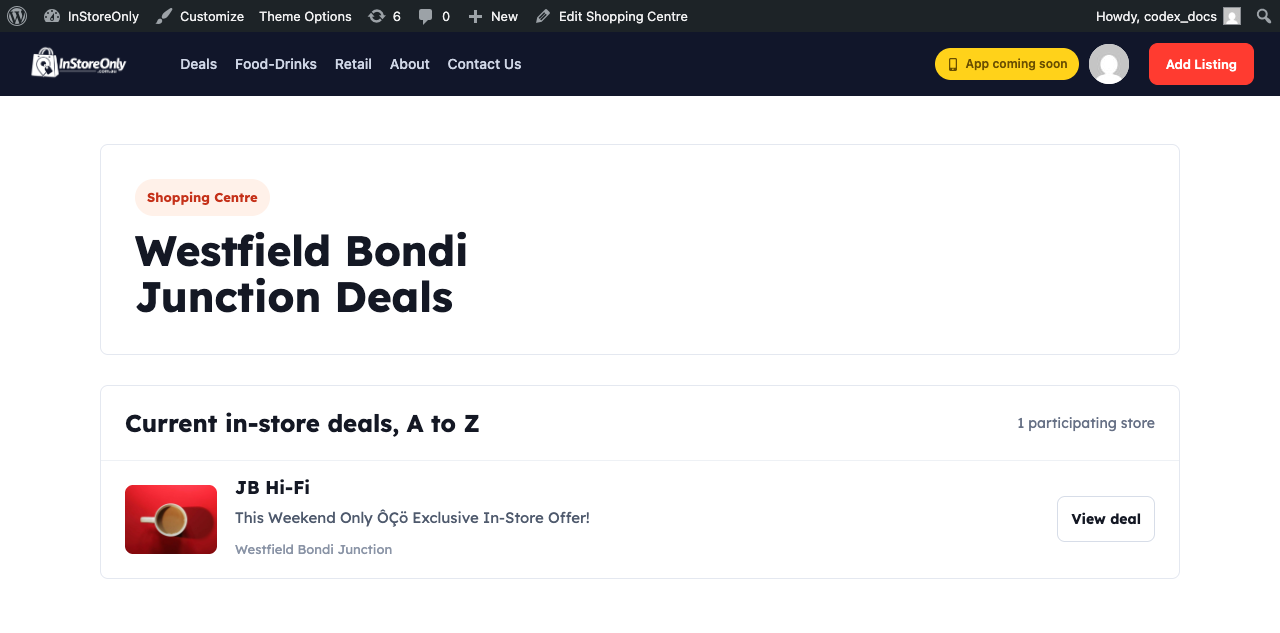
- Creates automatic frontend URLs like
/shopping-centre/westfield-bondi-junction/. - Shows all current published Directorist listings assigned to that centre.
- Sorts participating store deals alphabetically by store name.
- Adds an Elementor widget named Shopping Centres.
- Keeps shortcode support for non-Elementor pages.
- Adds a previewable legacy-centre import/sync tool under Listings > Shopping Centre Tools.
Screenshot Overview
Plugin guide page:
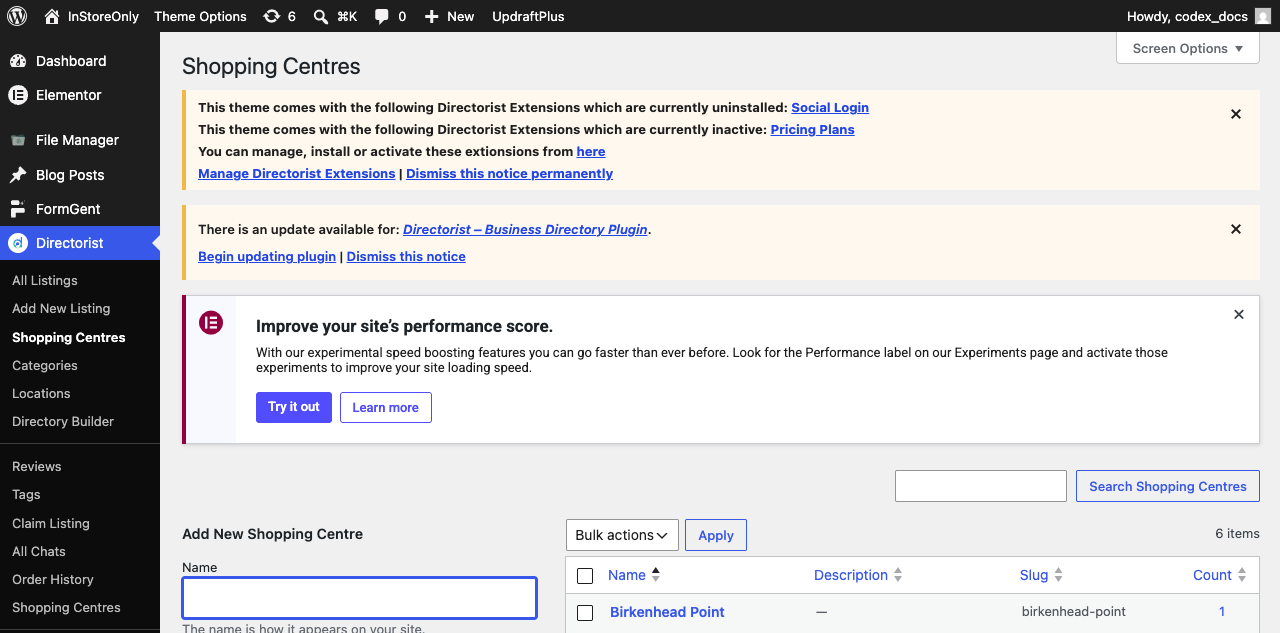
Shopping Centres admin list:
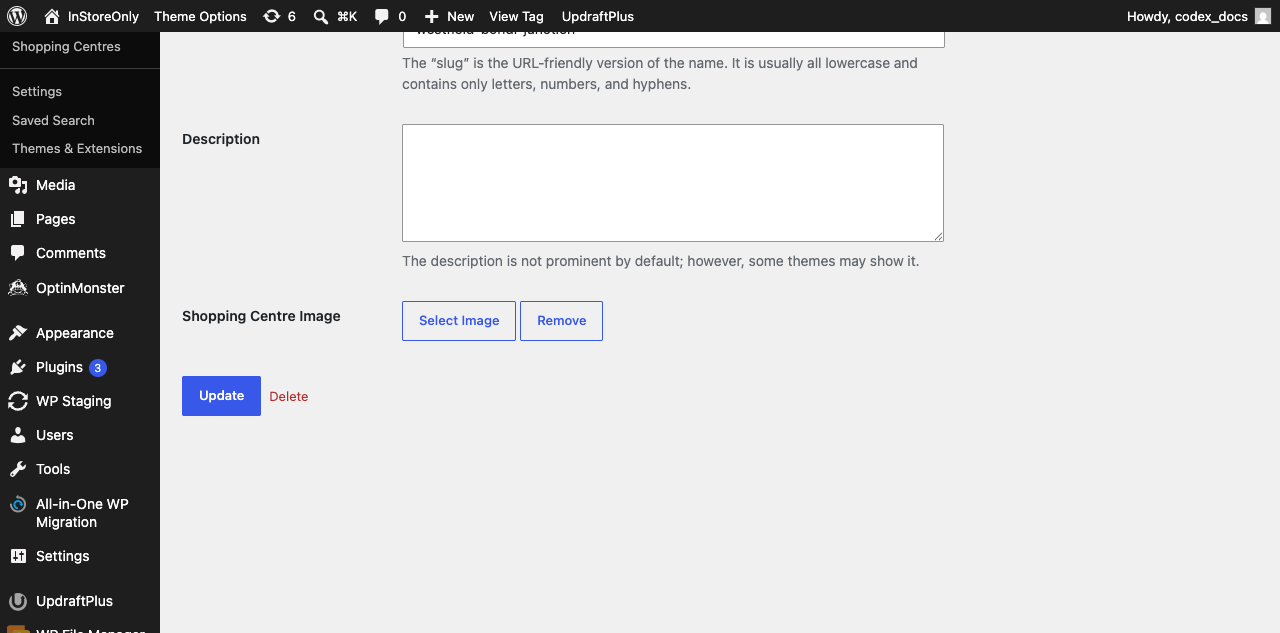
Shopping Centre image field:
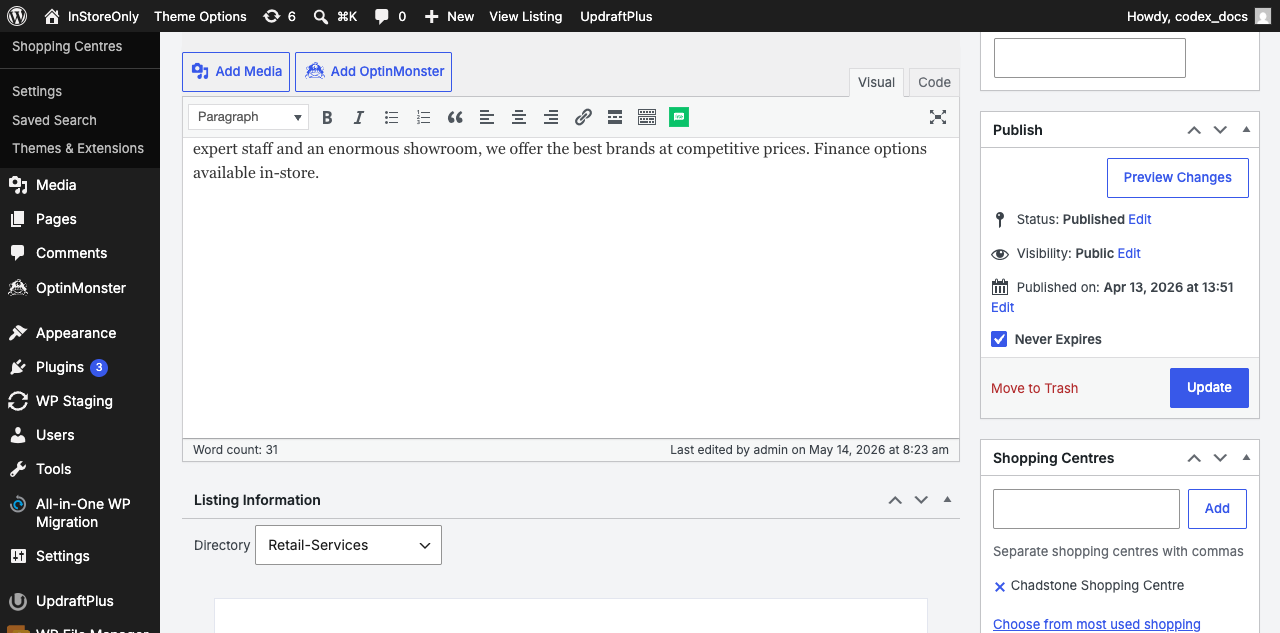
Assign a listing to a Shopping Centre:
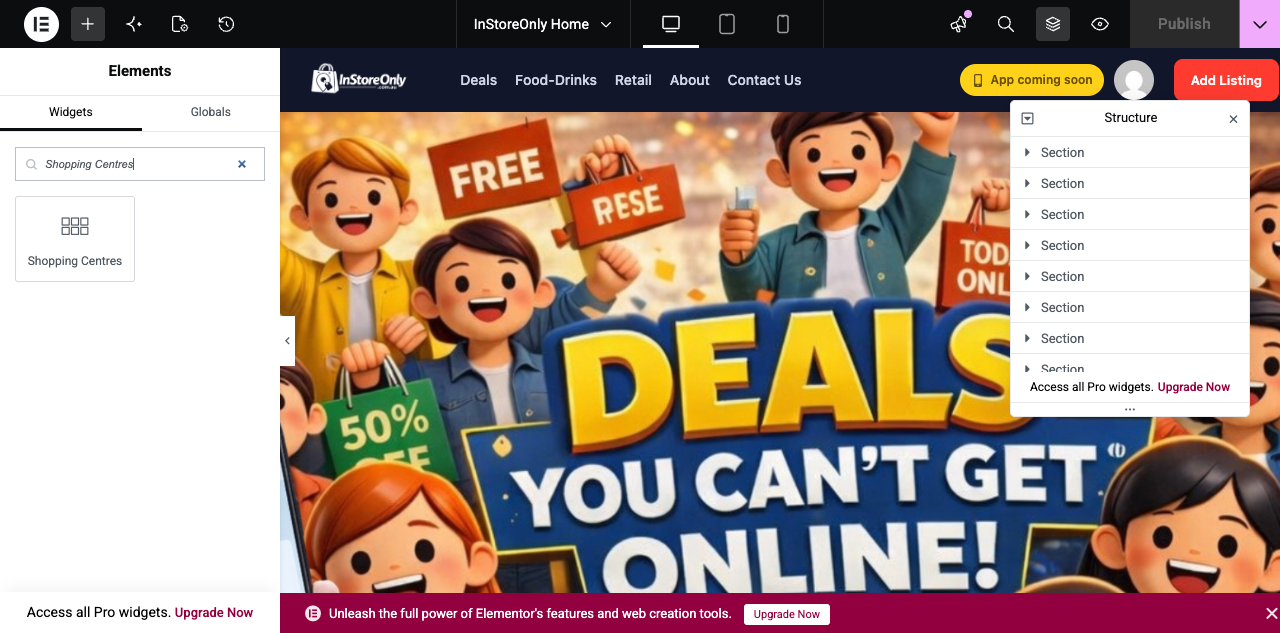
Elementor widget search:
Frontend Shopping Centre page:
Admin Usage
Import Legacy Shopping Centres
Go to:
Listings > Shopping Centre Tools
Under Legacy Shopping Centre import, review the eligible, existing, and new-centre counts, then click Import / Sync Legacy Centres. The importer excludes state headings and generic venue types, reuses matching managed centres, and does not delete the old tags. It is safe to run again after new legacy centres are added.
1. Check The Plugin Is Active
Go to:
Plugins > Installed Plugins
Confirm Directorist Shopping Centres is active.
2. Create A Shopping Centre
Go to:
Directorist > Shopping Centres
Then:
- Enter the centre name, for example
Westfield Bondi Junction. - Leave the slug blank unless you need a custom URL.
- Add a description if needed.
- Click Select Image under Shopping Centre Image.
- Upload or choose an image from the Media Library.
- Click Add New Shopping Centre or Update.
The uploaded image is used on homepage tiles and centre pages.
3. Assign A Deal Listing To A Shopping Centre
Go to:
Directorist > All Listings
Then:
- Open the deal listing.
- Find the Shopping Centres box on the right side.
- Tick or add the correct centre.
- Click Update.
That listing will now appear on the selected shopping centre page.
4. Add Shopping Centre Tiles With Elementor
Edit the homepage with Elementor.
- Search for the widget named Shopping Centres.
- Drag it into the page.
- Use the Content tab to set:
- Title
- Show or hide title
- Desktop/tablet/mobile columns
- Hide empty centres
- Limit
- Use the Style tab to adjust:
- Heading style
- Grid gap
- Card background, border, radius, shadow, height, and padding
- Image height and radius
- Centre name typography and color
- Deal count typography and color
5. Configure The Complete Shopping Centres Archive
Go to Listings → Shopping Centre Tools → Archive display settings.
You can independently control the /shopping-centres/ archive:
- Show or hide publicly visible centres that have no current deals.
- Show 6, 12, 24, or all centres per page.
- Enable or disable archive search.
- Sort by centre name, current deal count, or recently added.
- Show or hide the current-deal count on archive cards.
The default shows empty centres, 12 per page, matching the complete staging archive. Per-centre Public visibility always wins: a centre explicitly marked hidden remains hidden everywhere. Homepage display remains controlled separately by its Elementor widget.
6. Add Shopping Centre Tiles With Shortcode
Use this shortcode on a normal WordPress page:
[directorist_shopping_centres hide_empty="1"]Useful options:
[directorist_shopping_centres title="Shop deals by shopping centre" columns="3" hide_empty="1" number="0"]Option meanings:
| Option | Example | Meaning |
|---|---|---|
title |
Shop deals by shopping centre |
Heading above the tiles |
columns |
3 |
Number of columns |
hide_empty |
1 |
Hide centres with no deals |
number |
0 |
Limit count; 0 means show all |
7. Show Deals For One Centre With Shortcode
Use:
[directorist_shopping_centre_deals centre="westfield-bondi-junction"]The centre value can be the shopping centre slug.
How The Dynamic Data Works
The extension does not use hardcoded demo data.
It reads real WordPress/Directorist data:
- Shopping centre names come from the Shopping Centres taxonomy.
- Shopping centre images come from the image field on each centre.
- Deal listings come from published Directorist listings.
- Store names are read from listing meta such as
_store_name. - Offer text is read from deal subtitle or summary fields when available.
- Deal page links are normal Directorist single listing URLs.
Sync Existing Listings
If older listings already have a Directorist custom field like Shopping Centre / Venue, go to:
Directorist > Shopping Centres
Then click Sync Existing Listings.
The sync checks these listing meta keys:
_shopping_centre_venueshopping_centre_venue_shopping_centre_nameshopping_centre_name
It creates matching Shopping Centre terms and assigns listings automatically.
Frontend URLs
Shopping centre pages are generated automatically.
Example:
/shopping-centre/westfield-bondi-junction/If the URL gives a 404 after activation, go to:
Settings > Permalinks
Then click Save Changes once.
Developer Notes
Main files:
| File | Purpose |
|---|---|
directorist-shopping-centres.php |
Main plugin bootstrap, taxonomy, shortcodes, syncing, templates |
includes/class-elementor-shopping-centres-widget.php |
Elementor widget and style controls |
templates/taxonomy-shopping-centre.php |
Frontend taxonomy template |
assets/css/frontend.css |
Frontend styles |
assets/js/admin.js |
Admin image picker |
Important constants:
Directorist_Shopping_Centres::TAXONOMY        // at_biz_dir-shopping-centre
Directorist_Shopping_Centres::TERM_IMAGE_META // _dsc_image_id
Useful filters:
directorist_shopping_centres_meta_keys
directorist_shopping_centres_deal_ids
Verification Checklist
After setup:
- Create or edit a shopping centre.
- Upload a centre image.
- Assign at least one Directorist listing to that centre.
- Open the shopping centre frontend URL.
- Confirm the listing appears.
- Click the listing and confirm it opens the Directorist single listing page.
- Add the Elementor widget to the homepage and style it from Elementor.