Bunnyflare
Content Delivery Network (CDN) proxy your site like Cloudflare, but with BunnyCDN.
Install
This is the repository archive. It installs, but the folder name will carry the branch suffix and updates will not flow.
Install straight from GitHub with WP-CLI:
wp plugin install https://github.com/niiknow/wp-bunnyflare/archive/refs/heads/main.zipUltimately, we want to use BunnyCDN proxy like Cloudflare.
In order to use this plugin, your current site must be hosted on www or you use a DNS service that support Alias record:
Step 1 - create zone ApiKey - "enter your api key" Origin Url: https://IP-Address Canonical Url: https://www.example.com Name: www-example-com
Create ZoneStep 2 - zone found, setup DNS
Now that you have the zone, you need to go configure DNS example.com A IP www.example.com CNAME www-example-com.b-cdn.net
if your provider has alias record, then setup example.com ALIAS www-example-com.b-cdn.net
otherwise, you can setup example.com to redirect to www.example.com with .htaccess
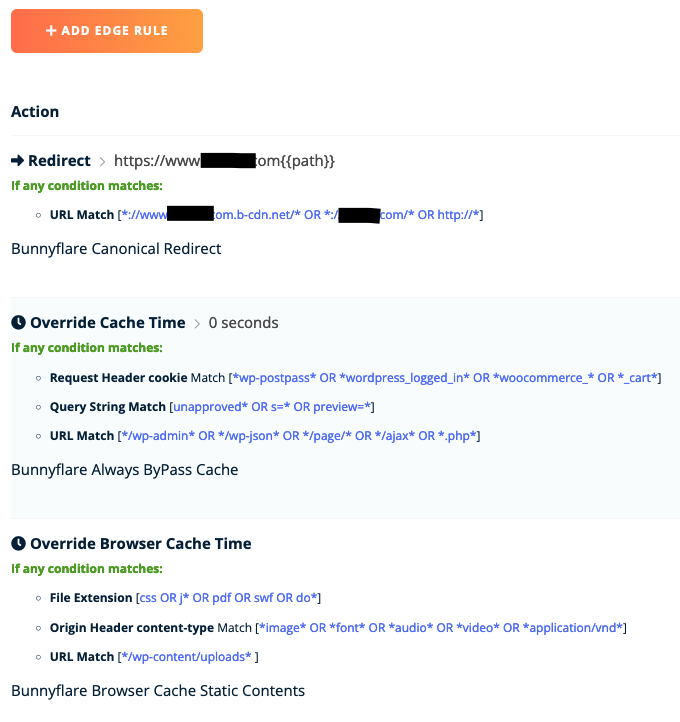
Step 3 - Issue SSL and apply EdgeRules You must complete the DNS configuration above in order to issue SSL.
if DNS match cname, enable issue SSL button, otherwise disable
issue ssl for example.com issue ssl for www.example.comcheckbox: [x] Browser Cache Static Contents [x] Always ByPass Cache [ ] Bunnyflare Canonical SSL Redirect
Apply selected Edge Rules