WPB One Page Navigation
Adds Elementor-style one-page anchor navigation to WPBakery rows.
Install
No release zip yet. The repository archive installs, but the folder name will carry the branch suffix and updates will not flow:
wp plugin install https://github.com/gitsanje/wpb-one-page-nav/archive/refs/heads/main.zipWPB One Page Nav adds a floating navigation panel to the WPBakery Page Builder editor. It helps you organize, identify, and reorder sections while building a one-page layout.
Features
- Clear section labels — Give each WPBakery row a custom Navigation Label so it is easy to identify in the editor.
- Live hierarchy — View rows, sections, and nested columns in a structured navigation tree.
- Editor synchronization — Selecting an item in the panel highlights the matching WPBakery element.
- Expand and collapse — Expand or hide nested content and collapse the navigation panel when more editor space is needed.
- Row visibility controls — Choose which rows appear in the navigation.
- Drag and drop — Reorder compatible rows and move them within the supported WPBakery hierarchy.
- Editor-only loading — Assets load only in the WPBakery editor and do not affect the public-facing page.
Requirements
- WordPress 7 or later
- PHP 7.4 or later
- WPBakery Page Builder
Quick Start
- Activate the plugin in WordPress.
- Open a page in the WPBakery editor.
- Open Row Settings for the section you want to identify.
- Enter a value in Navigation Label.
- Save the row and use the floating navigation panel to browse or organize the layout.
Download and Install
Download the latest WPB One Page Nav ZIP
To install the plugin from the WordPress dashboard:
- Download
wpb-opn.zip. - Go to Plugins > Add New Plugin in WordPress.
- Select Upload Plugin.
- Choose the downloaded ZIP file and select Install Now.
- Activate WPB One Page Nav.
- Open a page in the WPBakery editor to use the navigation panel.
WPBakery Page Builder must be installed and active for the plugin to work.
Usage Guide
Watch the complete walkthrough:
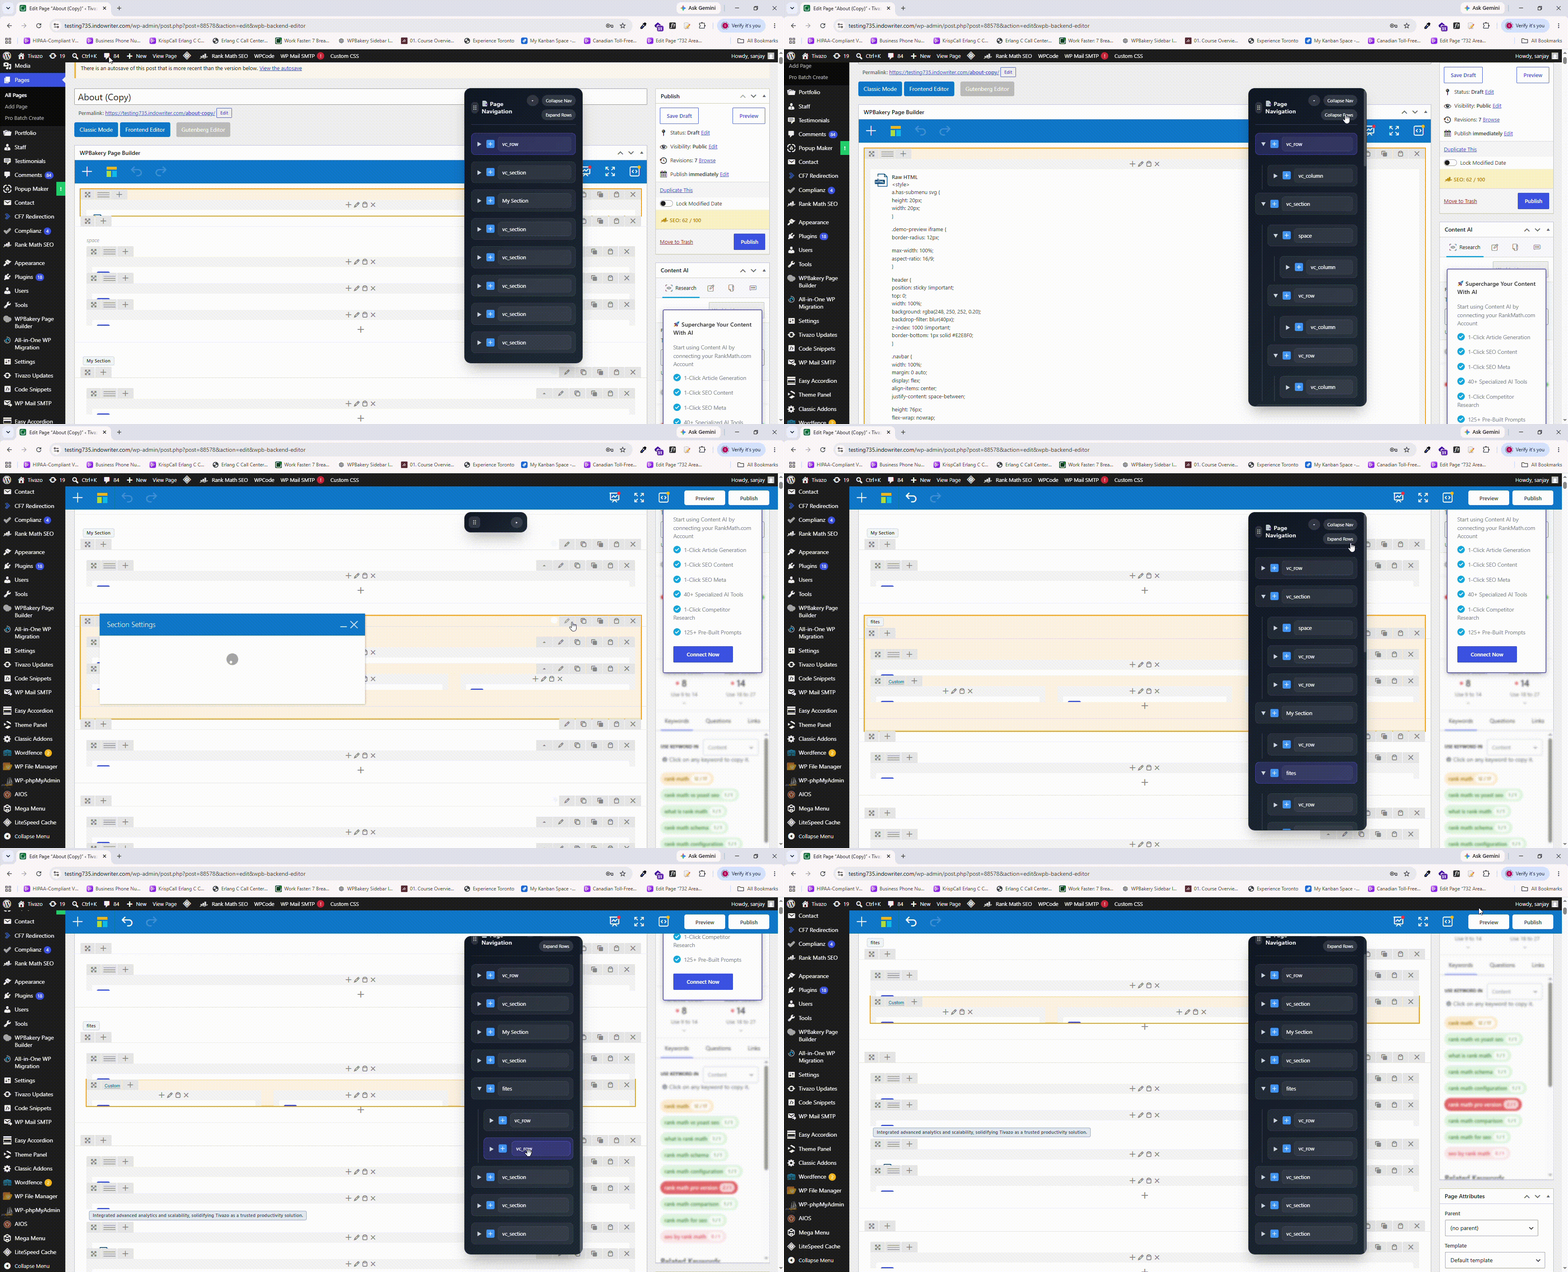
Open the WPB One Page Nav usage guide
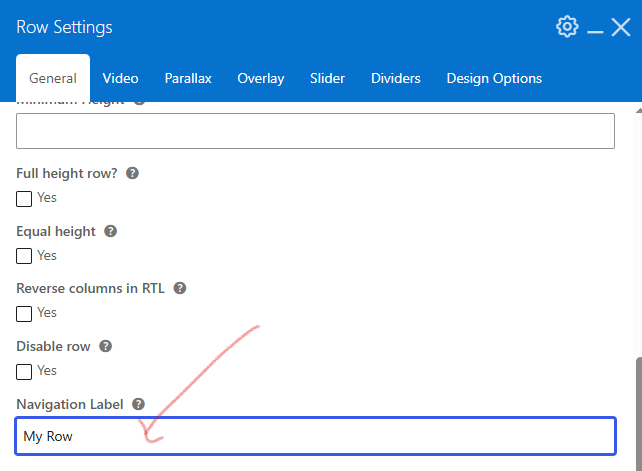
1. Add a Navigation Label
Open a row's settings and enter a clear name in the Navigation Label field. Use names that describe the content or purpose of the section, such as Hero, Features, or Contact.
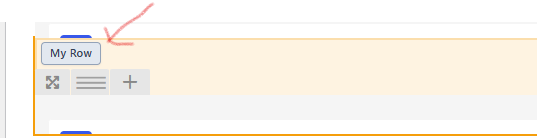
2. See the Label in the Editor
The label appears on the corresponding WPBakery row, making the section easier to recognize while editing.
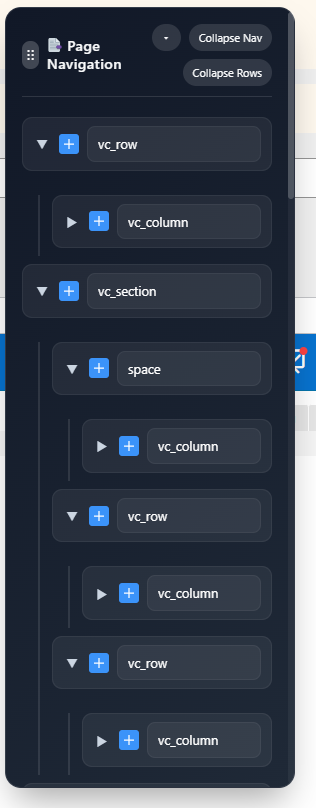
3. Manage the Page Structure
Use the floating panel to inspect the layout hierarchy, select sections, expand or collapse nested content, and reorder supported rows.
Developer Setup
From the plugin directory, install dependencies and create the production bundle:
npm install
npm run build
Start the development build with file watching:
npm startThe JavaScript source is kept in assets/js/ and bundled into build/wpb-opn.js. Do not edit generated files in build/ directly.
Tests
Run the fast JavaScript unit tests:
npm testRun the Cypress browser tests against a local WordPress installation with WPBakery active:
npx cypress install
npm run test:e2e:open
Configure the local .env file with the WordPress URL, an editable WPBakery page ID, and test credentials. Keep this file private:
CYPRESS_BASE_URL="http://localhost/wordpress1/wordpress"
CYPRESS_WPB_EDITOR_PATH="/wp-admin/post.php?post=5102&action=edit"
WP_USERNAME="your-wordpress-username"
WP_PASSWORD="your-wordpress-password"
The Cypress suite logs in automatically, opens the editor, and checks navigation rendering, selection, collapse and expand behavior, row state, and drag safeguards.
Contributing
- Run
npm install. - Use
npm startwhile developing JavaScript changes. - Test the workflow in the WPBakery editor.
- Run
npm testandnpm run buildbefore submitting changes. - Run the Cypress suite when changing editor interactions.