Gravity Forms Blueshift
Allow emails to run through the Blueshift API
Install
This is the repository archive. It installs, but the folder name will carry the branch suffix and updates will not flow.
Install straight from GitHub with WP-CLI:
wp plugin install https://github.com/bonniedooneconsulting/gravityformsblueshift/archive/refs/heads/master.zipGravity Forms Blueshift Feed Add-On
Integrates Gravity Forms with Blueshift, allowing form submissions to be automatically sent as mailings via Blueshift.
Construct email content and send mailings via Blueshift using Gravity Forms.
Installation
Requires Gravity Forms Version 1.9.14.26 or higher.
- Download or clone the repo files and move them to the
wp-content/plugins/folder of your WordPress site. You can also download the repo as a zip file and upload via the WordPress Dashboard. - Go to WordPress Dashboard > Plugins and activate Gravity Forms Blueshift.
- Go to WordPress Dashboard > Forms > Settings > Blueshift.
- Enter your Blueshift API credentials (URL and API key).
How to use the Add-On
Adding Segment uuids
- Visit the Template you wish to use in the Blueshift interface and copy the uuid from the url.

- Go to Go to WordPress Dashboard > Forms > Settings > Blueshift
- Scroll down to the
Blueshift Segment Settingsadd in a segment name and then paste the segment into theSegment UUIDinput field that was copied from the url in Blueshift.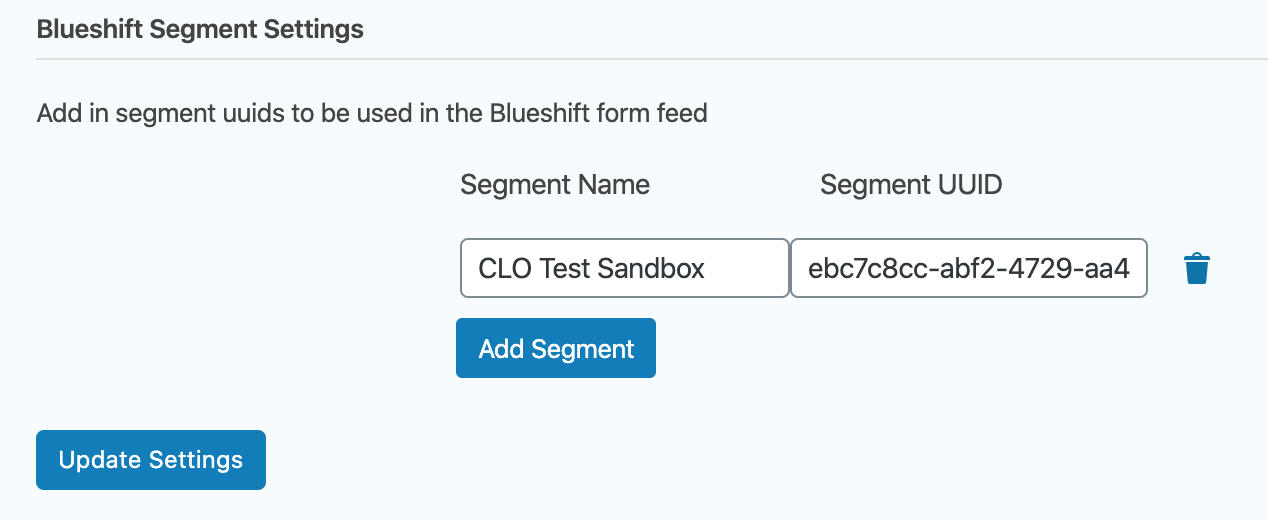
- Repeat this for each segment that will be needed in the feeds.
Template Creation
To create a template go to the Blueshift Templates custom post type on the wp admin menu.
Add in a post title and content.
The [FEEDCONTENT] tag should be added into the post content
where ever you would like the feed content to be placed into the template when it is rendered.
When the Blueshift Template is saved it will send the content and title of to Blueshift, the
post title will be mapped to the template name in Blueshift and the post content will be mapped to
the template body.
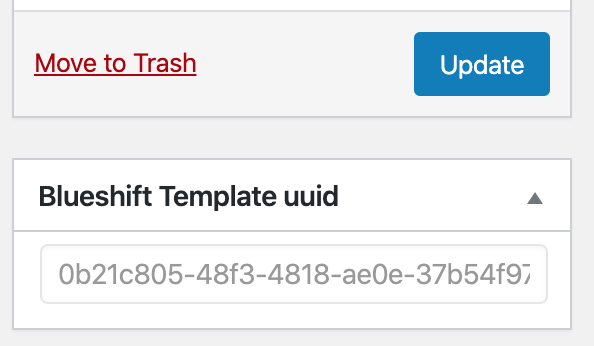
If the template creation is successful
in Blueshift you will see a uuid appear in the Blueshift Template uuid meta box below the publish button:
If validation errors occur when the template is being created/updated in Blueshift, the validation errors will be displayed at the top of the post edit screen:
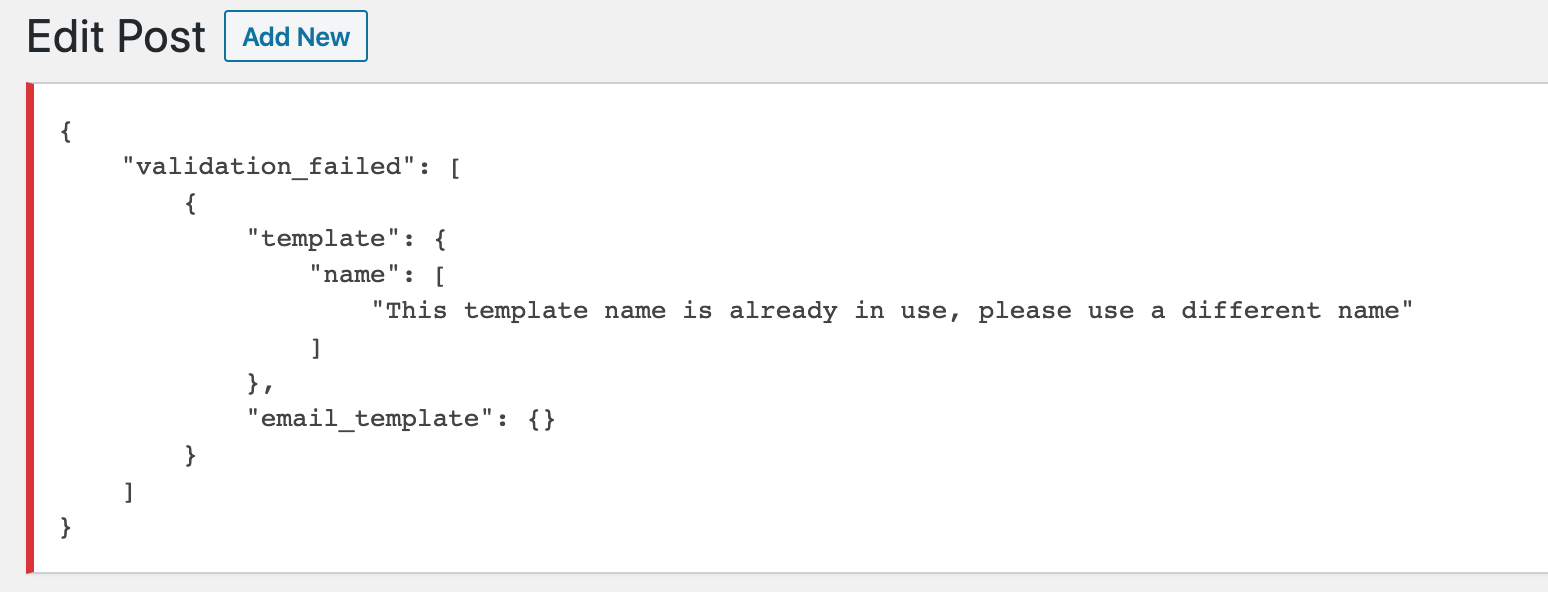
If your Blueshift template contains errors, please update the template and save the post again to make sure errors don't happen when the feed is processed after form submission.
Feed Setup and Creation
To create a new Blueshift Feed, select a form in Gravity Forms, and go to Settings > Blueshift
Feed Settings
Enter in a feed name and select the Blueshift Segment you would like the email to go to when the feed is processed.
Content Settings
Fill out the required fields and select the template you would like to use when the feed is processed.
The HTML Content field is what will replace the [FEEDCONTENT] tag in the Blueshift template when the template
is rendered.
On save, if there are validation issues with the template they will be displayed next to the field that has validation problems:

If errors occur please fix the field(s) and update the feed.
Mailing Settings
These fields will be mapped to the campaign in Blueshift. There are two types of mailings that can be used
Scheduled and Immediate, if a Scheduled mailing is used, it will simply add the input of the Mailing Delay in Minutes
field to the start time of the campaign.
Development Setup
To develop this plugin, all you need is an active WordPress installation with Gravity Forms installed.
Development Resources
Gravity Forms Add-On Framework Documentation
Release History
- 1.0.0
- The first proper release
- 0.0.1
- First build out
Future Features
- Test send email from wordpress through Blueshift
Contributing
- Fork it (https://github.com/yourname/yourproject/fork)
- Create your feature branch (
git checkout -b feature/fooBar) - Commit your changes (
git commit -am 'Add some fooBar') - Push to the branch (
git push origin feature/fooBar) - Create a new Pull Request