FreshBooks Integration for WooCommerce
WooCommerce FreshBooks integration plugin
by BeycanPress LLC · github.com/beycanpress/woocommerce-freshbooks · website
Install
No release zip yet. The repository archive installs, but the folder name will carry the branch suffix and updates will not flow:
wp plugin install https://github.com/beycanpress/woocommerce-freshbooks/archive/refs/heads/master.zipWooCommerce FreshBooks Integration Plugin
As the BeycanPress team, we decided to use FreshBooks in our company, but since we couldn't find any plugin, we developed a plugin ourselves and decided to publish it as open source. We welcome contributions from all users who use FreshBooks with WooCommerce.
This extension has been developed with the BeycanPress/FreshBooks package, that is, the PHP SDK.
Installation
- Download the plugin zip file.
- Go to the WordPress admin area and click on Plugins in the left sidebar menu.
- Click on the Add New button at the top of the page.
- Click on the Upload Plugin button at the top of the page.
- Select the zip file from your computer and click the Install Now button.
- Activate the plugin.
Configuration
Create FreshBooks APP
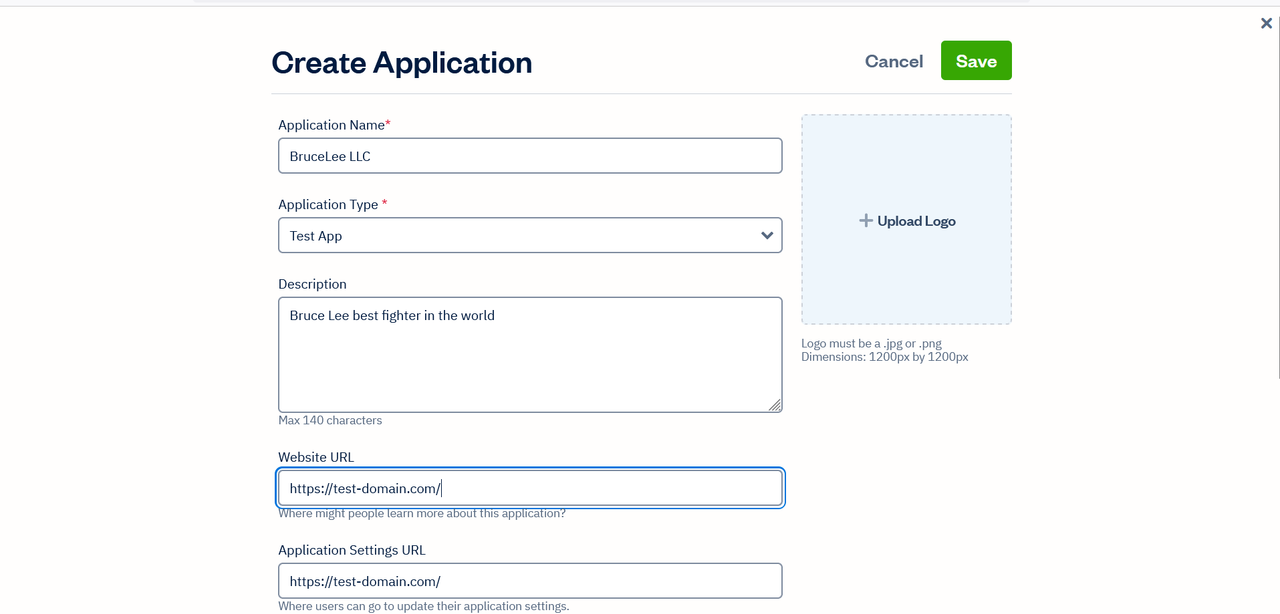
- Go to the FreshBooks Developer Portal and click on the Create an App button.


Enter Your APP Information
Enter Your APP Scope
When selecting the scopes, you should definitely choose the scopes indicated in the image and text below.
user:profile:read
user:invoices:read
user:invoices:write
user:clients:read
user:clients:write
user:payments:read
user:payments:write
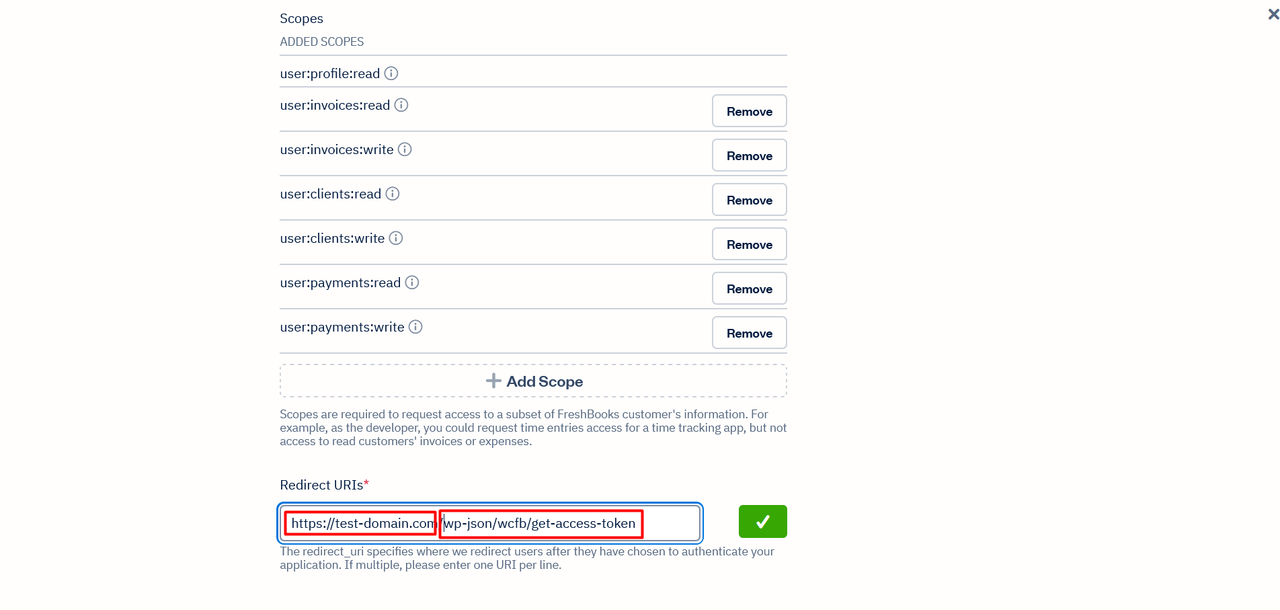
Enter Your APP Redirect URI
This is important because if there is an error here, the access section will not work.
Here you definitely need to enter the API URL of our plugin after your domaniniz as shown below and in the picture.
https://test-domain.com/wp-json/wcfb/get-access-token
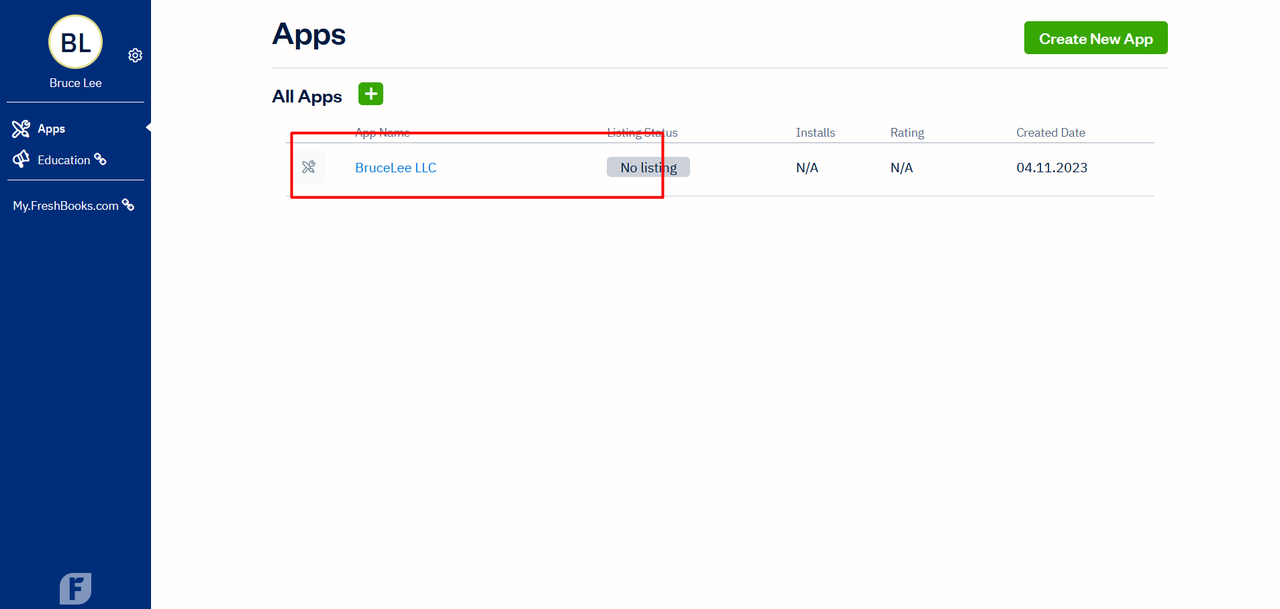
Save Your APP

Enter Your APP and Copy Your APP ID and APP Secret

In WP-Admin, click on the WC FreshBooks Settings Menu
Enter your copied APP ID and APP Secret code in the relevant fields.
After entering your APP ID and APP Secret code, click save above and the page will refresh.
Then press the "connect" button.

After Clicking the Connect Button
You will be redirected to the FreshBooks login page. After logging in, you will be asked to allow the application. Click the "Allow" button.

After All These Steps
Here you will see the business memberships or accounts in your FreshBooks account. Select the one that suits you and click save again.

Settings
Create invoice
If you want to create an invoice automatically when the order is completed, you can activate this option.
Send to email
If you want to send the invoice to the customer's email address, you can activate this option.
Excluded payment methods
If you want to exclude some payment methods, you can select them here. The invoice creation process will not work when payment is made with the methods you have selected here.
