AI Text Generator
AI Text Generator is a powerful WordPress plugin that allows you to generate AI-powered content directly inside your WordPress editor using OpenRouter AI models. Customize API settings, choose models, and generate high-quality text effortlessly.
Install
This is the repository archive. It installs, but the folder name will carry the branch suffix and updates will not flow.
Install straight from GitHub with WP-CLI:
wp plugin install https://github.com/abdulsamadshaikh/ai-text-generator/archive/refs/heads/main.zipAI Text Generator - WordPress Plugin
🚀 AI Text Generator is a powerful WordPress plugin that allows you to generate AI-powered content directly inside your WordPress editor using OpenRouter AI models. Configure API settings, choose models, and generate high-quality text effortlessly.
📌 Features
✅ AI-Powered Content Creation – Generate text using AI models like Google Gemma, DeepSeek, Mistral, etc.
✅ Custom API Configuration – Set your API Key, URL, Referer, and Timeout from the settings panel.
✅ Multiple AI Models – Choose from free and premium AI models.
✅ User-Friendly Interface – Simple and intuitive WordPress admin panel settings.
✅ Meta Box in Post Editor – Quickly generate AI content while writing blog posts.
✅ Error Handling & Notifications – Get clear error messages and success notifications.
📸 Screenshots
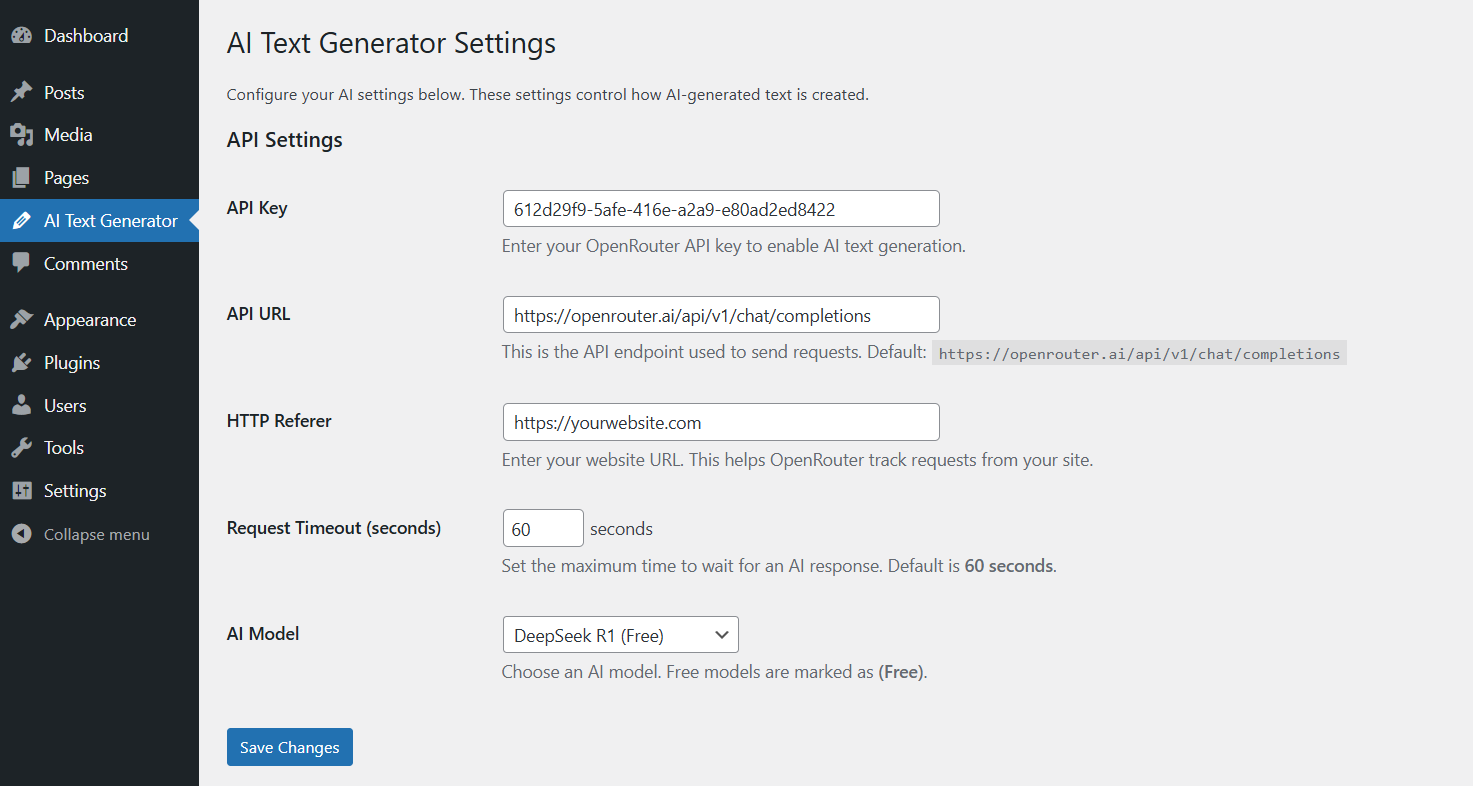
🔹 1. AI Text Generator Settings Page
Configure your API key, model selection, and request timeout.
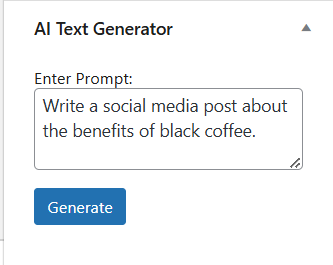
🔹 2. AI Text Generation in Post Editor
Enter a prompt and generate content instantly.
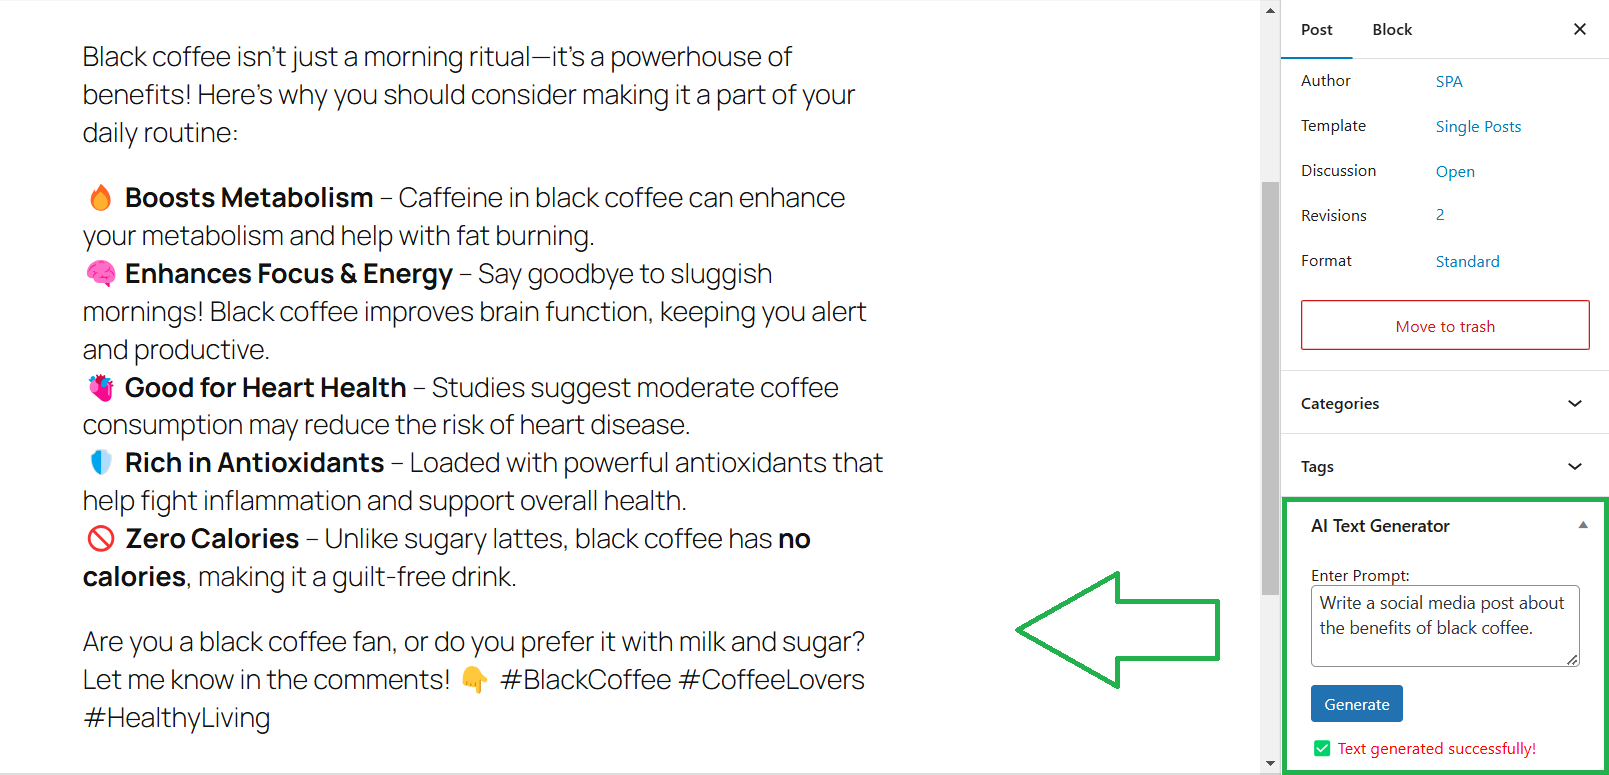
🔹 3. Success Notification
Confirmation message after saving settings.
🔧 Installation
Automatic Installation
- Download the plugin ZIP from GitHub.
- Go to WordPress Dashboard → Plugins → Add New.
- Click Upload Plugin, select the ZIP file, and click Install Now.
- Activate the plugin.
Manual Installation
- Download and extract the plugin files.
- Upload the folder to
/wp-content/plugins/ai-text-generator/using FTP. - Go to WordPress Dashboard → Plugins and activate the plugin.
🚀 Usage
Step 1: Configure API Settings
- Go to WordPress Dashboard → AI Text Generator.
- Enter your API Key, API URL, HTTP Referer, and Timeout.
- Choose an AI Model (e.g.,
google/gemma-7b-it:free). - Click Save Changes.
✅ Success notification will appear once settings are saved.
Step 2: Generate AI Text in Post Editor
- Open the WordPress post editor (Gutenberg or Classic Editor).
- Find the AI Text Generator meta box in the right sidebar.
- Enter a prompt (e.g., "Write an engaging blog intro").
- Click Generate.
- The generated text will be inserted into your post.
⚙️ Settings Explained
| Setting Name | Description |
|---|---|
| API Key | Your OpenRouter API key to connect with AI services. |
| API URL | API endpoint (default: https://openrouter.ai/api/v1/chat/completions). |
| HTTP Referer | Your website URL (helps OpenRouter track usage). |
| Timeout | Maximum wait time for AI response (default: 60 seconds). |
| AI Model | Choose from available AI models (e.g., google/gemma-7b-it:free). |
🛠 Troubleshooting
| Issue | Solution |
|---|---|
| No API Key Provided | Go to AI Text Generator Settings and enter your API key. |
| Invalid API Key | Check if your API key is valid on OpenRouter.ai. |
| No AI Response | Try a different AI model or increase the timeout setting. |
| AJAX Request Failed | Ensure your WordPress website can make API requests. |
| Page Not Found (404) | Make sure admin-ajax.php is accessible and WordPress permalinks are set correctly. |
📌 Supported AI Models
The plugin supports multiple AI models. Free models are marked:
- ✅
google/gemma-7b-it:free(Google Gemma 7B - Free) - ✅
deepseek/deepseek-r1:free(DeepSeek R1 - Free) - 🔒
mistralai/mistral-7b-instruct(Mistral 7B)
🤝 Contributing
We welcome contributions! To contribute:
- Fork the repository.
- Create a feature branch (
git checkout -b feature-name). - Make your changes.
- Commit and push (
git commit -m "Added new feature" && git push origin feature-name). - Open a pull request.
📜 License
This plugin is open-source and released under the GPL-2.0+ License.
📧 Support
Need help?
📩 Contact Abdul Samad
🌐 Visit Plugin Website